Quickstart
This page guides the new user to a quick overview on how to use BlenderFDS.
Table of contents
- Before starting
- Overview of the procedure
- Step 1: Open Blender
- Step 2: Explore the BlenderFDS preferences
- Step 3: Explore the BlenderFDS user interface
- Step 4: Save the example case
- Step 5: Export the FDS case
- Step 6: Look at what you have done!
- Step 7: Run the FDS solver, and open the results
- Step 8: Go back to BlenderFDS and import an existing FDS case
- Step 9: Relax and enjoy
Before starting
You should already have the Blender application installed on your computer, and the BlenderFDS addon enabled. If not, this page explains how to do that.
If you are completely new to Blender, I suggest the following preliminary interesting reads:
Overview of the procedure
We are going to open Blender, explore the BlenderFDS interface, and inspect the example FDS case. Then we will export the case, and run it within the FDS solver.
After that we are going to import one of your existing FDS cases, and discover that many FDS cases can coexist in the same .blend file, and share common assets.
So, let’s start!
Step 1: Open Blender
Open the Blender application. If your installation went smoothly here is what you will see.
Step 2: Explore the BlenderFDS preferences
Before going on, I am going to show you where to find the general BlenderFDS settings.
Click on the Edit > Preferences menu and the preferences panel opens up.
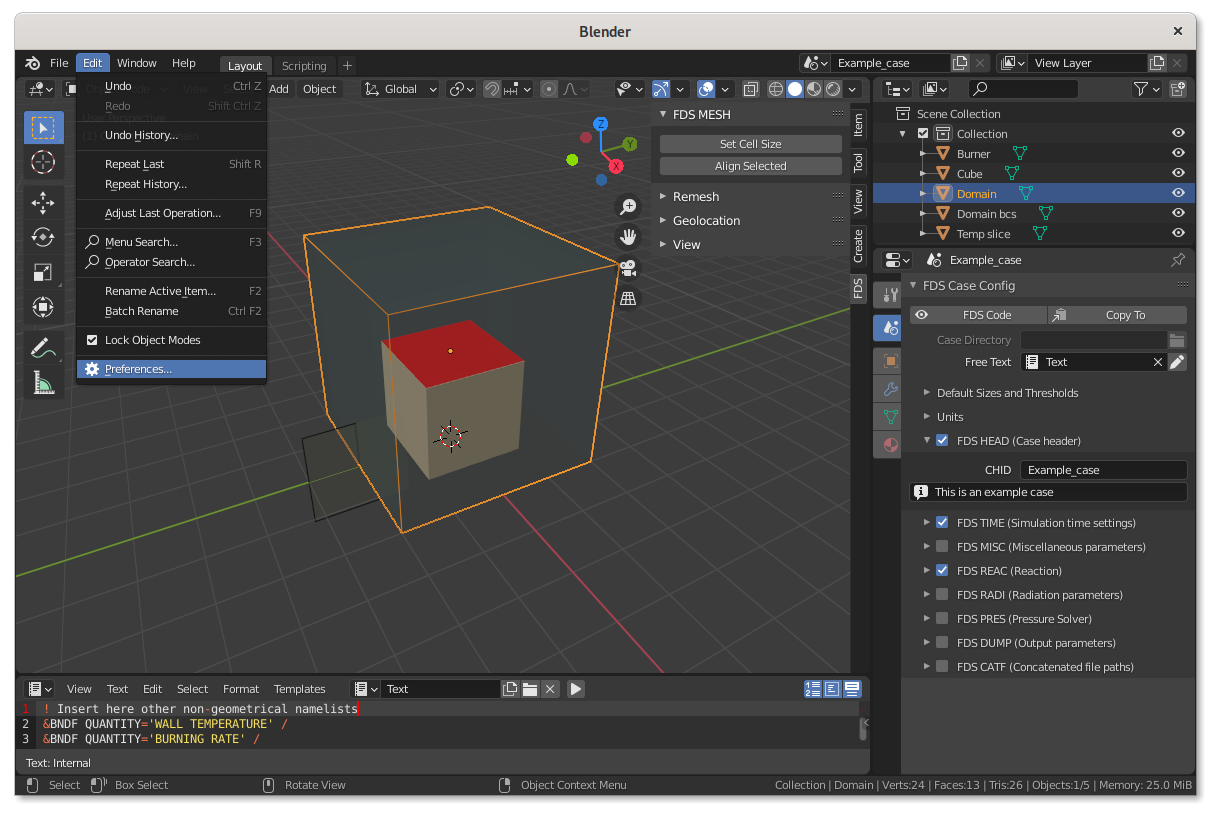
Click on the Add-ons tab on the left, and find the BlenderFDS addon preferences panel.
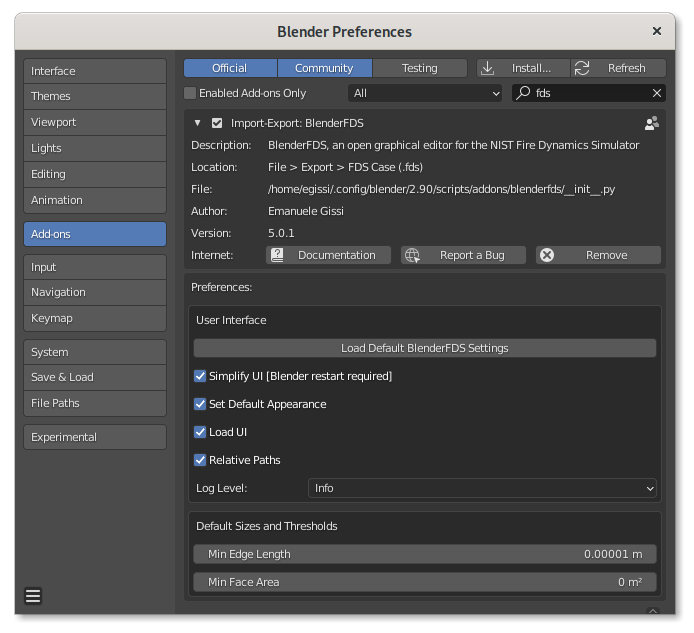
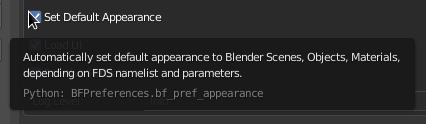
If you hover your cursor over any of the settings, an help popup appears providing an explanation.
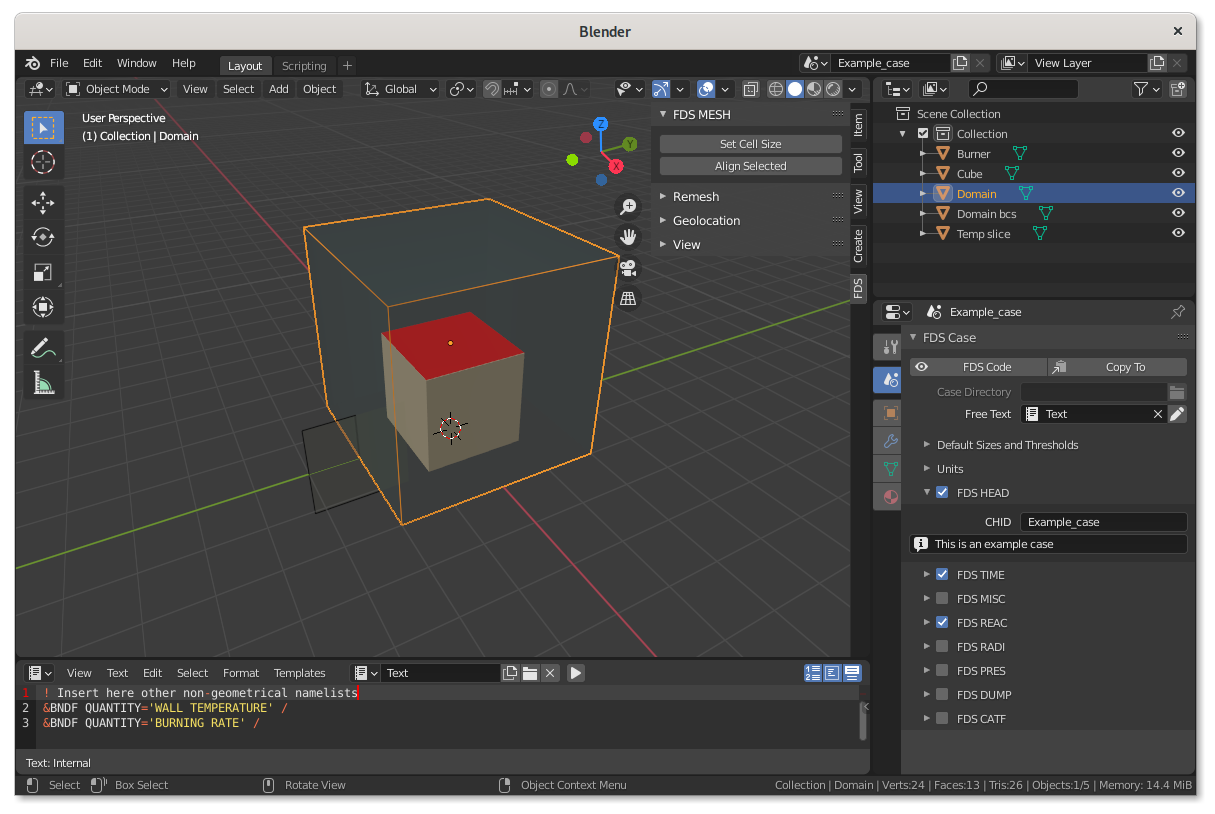
Step 3: Explore the BlenderFDS user interface
Blender provides a number of different editors for displaying and modifying different aspects of data. In BlenderFDS we generally use only some of them:
-
the
3D Viewporteditor, -
the
Oulinertree, -
the
Propertiespanels, -
and the
Text Editor.
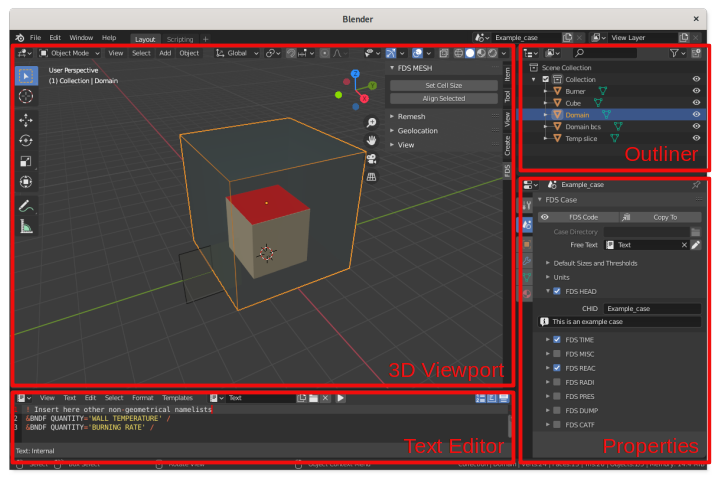
The 3D Viewport editor
The 3D Viewport editor is used to interact with the 3D scene for modeling.
Editing modes
On the left-hand side of this editor, you see its several editing modes, used for editing different kinds of data. In BlenderFDS we are going to use just two of them:
-
Object Modeis the default mode, and it is dedicated to object data-block editing (eg. position, rotation, size, …). -
Edit Modeis dedicated to object shape editing (eg. creating/moving/linking vertices/edges/faces). In Blender the object shape is called theBlender Mesh.
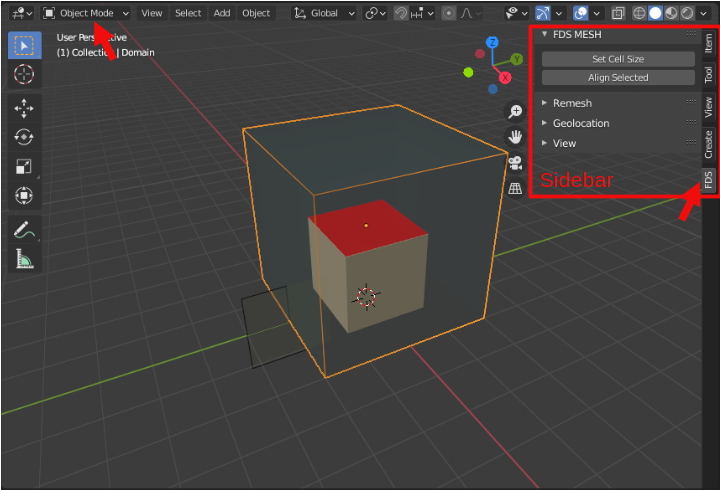
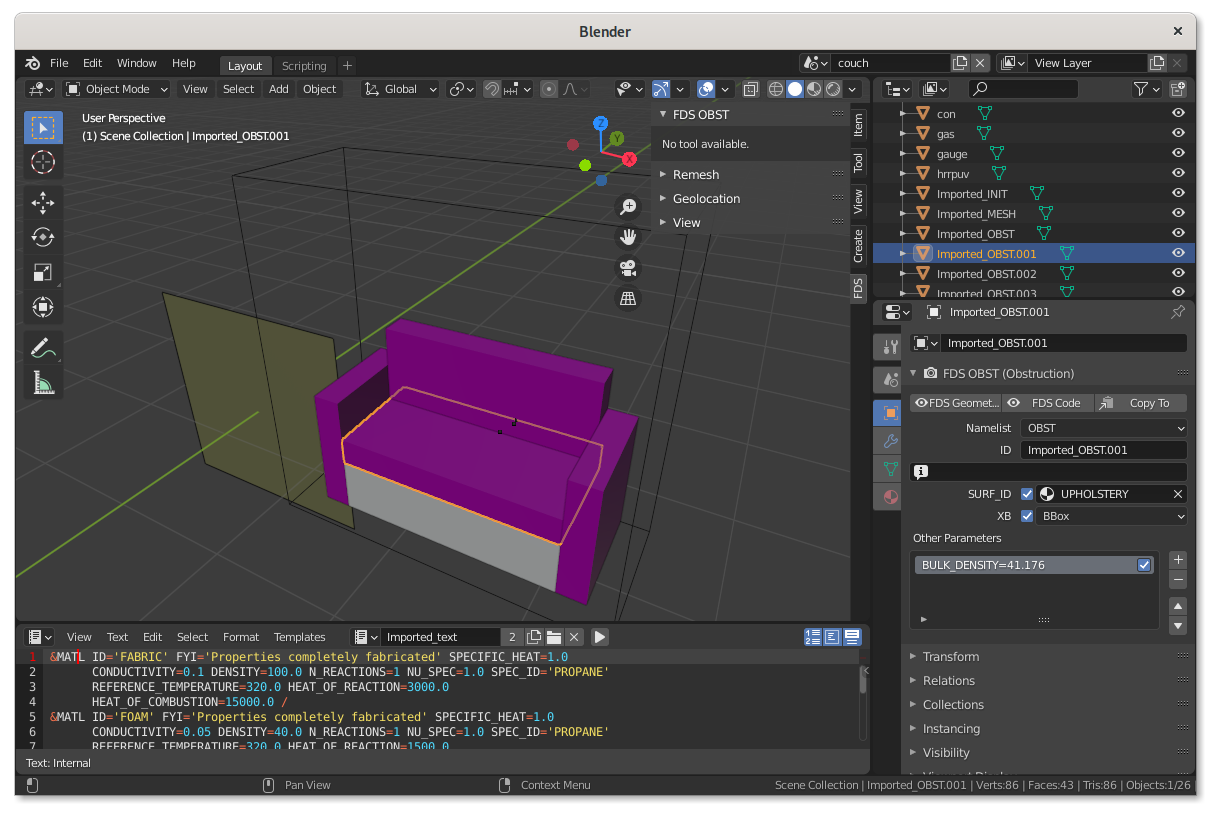
Sidebar
On the right-hand side of the 3D Viewport you see the Sidebar, that has a specific tab FDS for BlenderFDS related activities. The sidebar panels change depending on the selected object namelist.
In the following picture, you see:
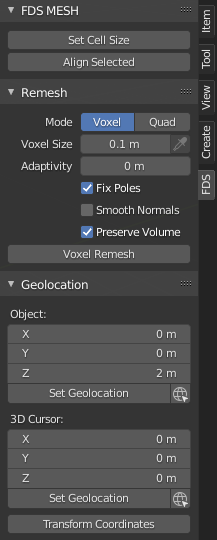
- the sidebar panel offering some tools for a
MESHnamelist; - the
Remeshpanel, that collects several tools used to fix malformed geometries and make them manifold (eg. the triangulated surfaces required by theGEOMnamelist); - the
Geolocationpanel, with tools that allow the precise geographic positiong of objects on the calculation domain, an useful feature when dealing with terrains in wildfire simulation cases or fire smoke pollution dispersion studies.
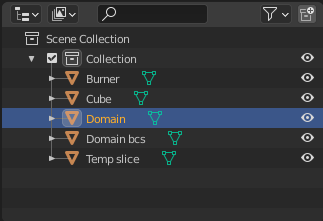
The Outliner editor
The Outliner is a tree that organizes the data of the blend file: Blender Scenes, Collections, Objects, Meshes, and Materials. This editor is used to view, select, manage the data in the scene.
Each row in the Outliner shows a data-block, and what other data-blocks it contains. Data-blocks can be dragged and dropped to manage data relations. Objects can be moved to collections by dropping on the name or contents of a collection.
Collections are a way BlenderFDS uses to organize the FDS case. The exported namelists are first ordered by collection, then by ID parameter alphabetic order. See this page for further detail.
The Properties editor
The Properties editor shows and allows editing of many active data properties.
This editor has several categories, which can be chosen via tabs, the icons column to its left. Each tab regroups properties and settings of a specific data type, such as Blender Scene, Object, and Material.
Let’s explore each of them.
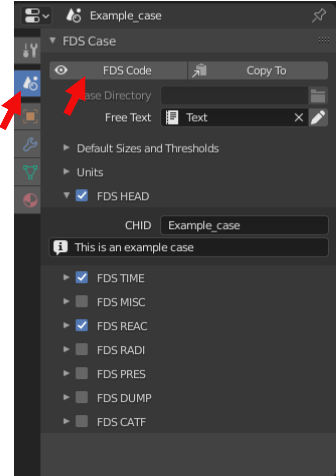
Blender Scene tab
The Blender Scene tab is used for the FDS case general configuration. In these panels you can edit the parameters of many general FDS namelists: HEAD, TIME, MISC, REAC, …
Each panel manages several of the most common parameters of the related namelist; any parameter that is not directly managed by the interface can be entered in the generic Other Parameters widget at the very bottom of each panel.
At the top of the tab, you find two buttons: FDS Code and Copy To. Clicking on the first button shows the FDS code that is going to be exported from the selected Blender Scene. The second button is used to copy the properties from a scene to another.
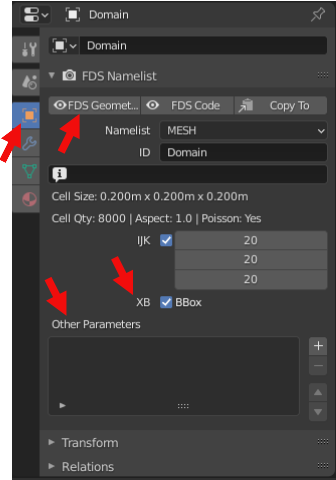
Blender Object tab
The Blender Object tab is used for adding the parameters of FDS namelist groups having any kind of geometric effect, such as OBST, VENT, GEOM, SLCF, …
All these namelists have parameters that set their geometric properties, such as XB, XYZ, PB, VERTS, FACES, …
The panel changes depending on the selected namelist, and manages several of its most common parameters; any parameter that is not directly managed by the interface can be entered in the generic Other Parameters widget at the very bottom of the panel.
At the top of the tab, you find three buttons: FDS Geometry, FDS Code, and Copy To. Clicking on the first button creates a temporary object in the 3D Viewport that shows how the choosen geometry (eg. XB, XYZ, PB, …) is going to be exported to the FDS case. Clicking on the second button shows the FDS code that is going to be exported from the selected Blender Object. The third button is used to copy the parameters values from the currently active object to other selected objects.
See this wiki page for further details on how object geometries are exported to the FDS case.
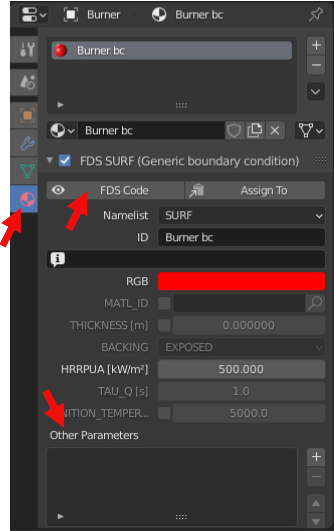
Blender Material tab
The Blender Material tab is used for editing the FDS boundary conditions in the SURF namelist, related to the currently selected Blender Object.
The panel manages several common SURF parameters; any parameter that is not directly managed by the interface can be entered in the generic Other Parameters widget at the very bottom of the panel.
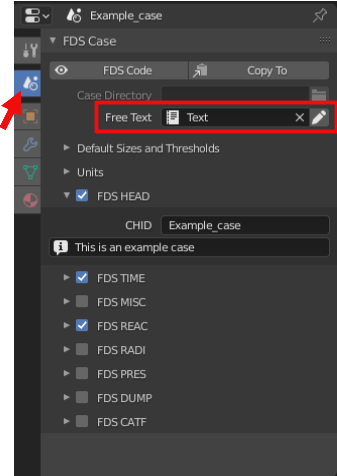
The Text Editor
The Text Editor is used to create a text file, that BlenderFDS can directly attach to the exported FDS case. This feature is used to append other non-geometrical or unmanaged namelists (eg. MATL, BNDF, …) to the FDS case.

The choice of the Free Text file to be attached to the FDS case is specified in the Properties editor.
Step 4: Save the example case
After exploring the BlenderFDS user interface, it is time to save the .blend file of this default example case to a local directory. Click on the File > Save As menu, name the file as example.blend, and save it on your computer.
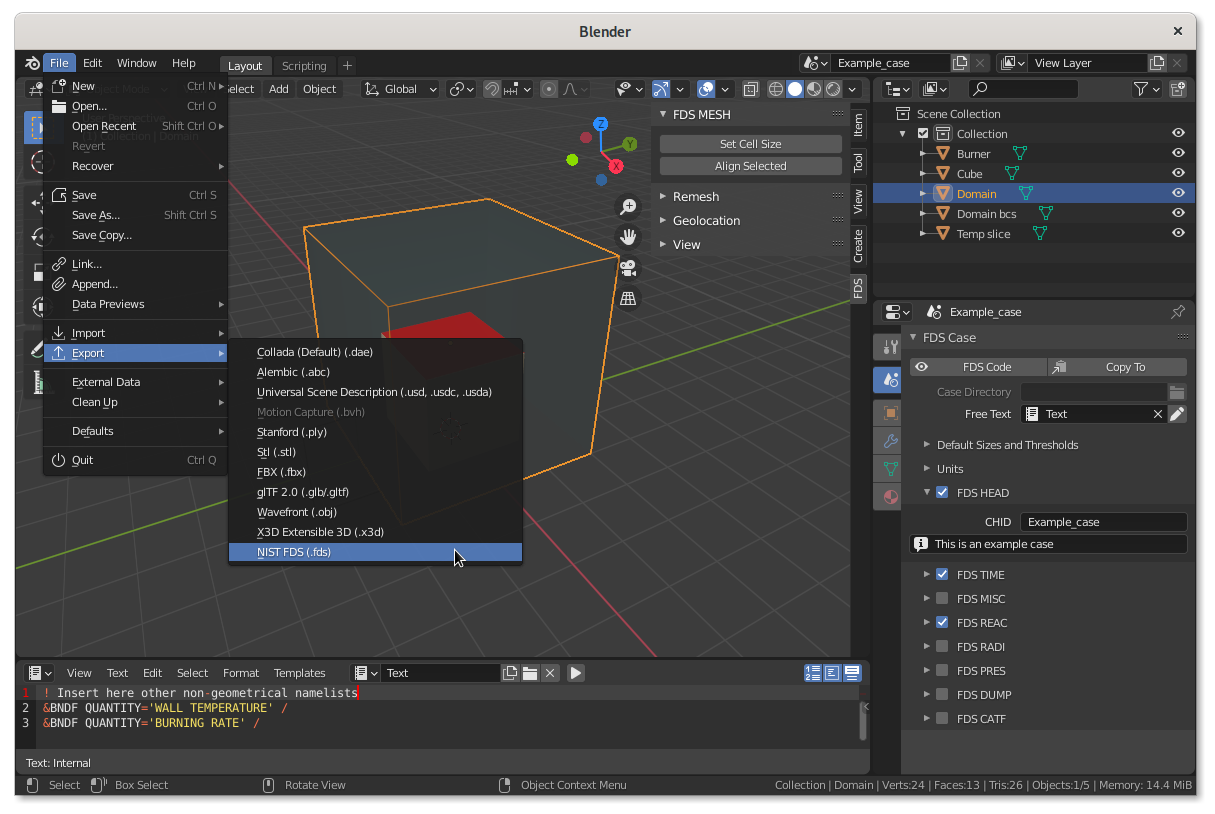
Step 5: Export the FDS case
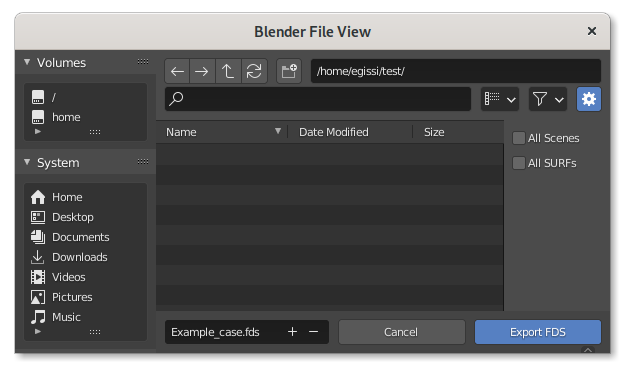
Now click on the File > Export > NIST FDS menu, and export the FDS case you just explored to a newly created directory.
Step 6: Look at what you have done!
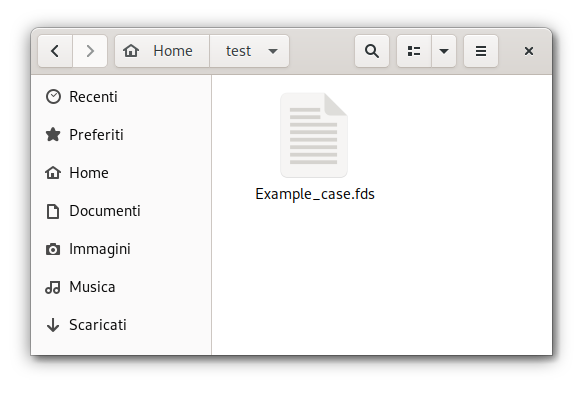
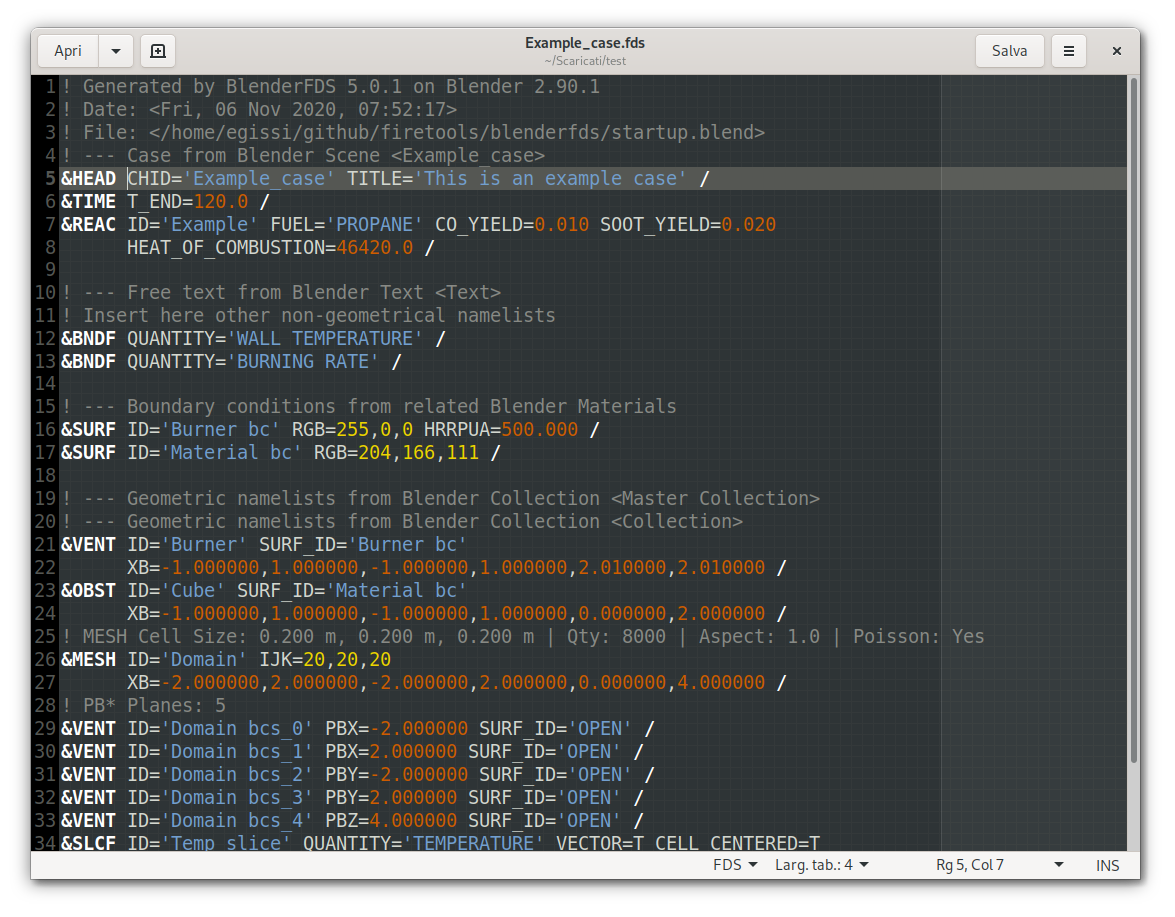
The Example_case.fds file was exported.
If you have a proper text editor installed on your computer, you can double click on the Example_case.fds file, and see what is inside.
Here I am opening the Example_case.fds file with the GEdit text editor on a Linux computer. Notice the nice syntax-highlighting that is provided by GEdit with the FDS extension.
On MS Windows you can install the free and open-source Notepad++ with its FDS extension.
On macOS, you can install Sublime Text and use SublimeFDS for syntax highlighting.
Step 7: Run the FDS solver, and open the results
Depending on the installed operating system on your computer, there are different ways of running the FDS solver. Look at the FDS User’s Guide if you need help on that. I shall add that, if you are willing to learn how to use BlenderFDS, you should already be capable of running simple cases in FDS!
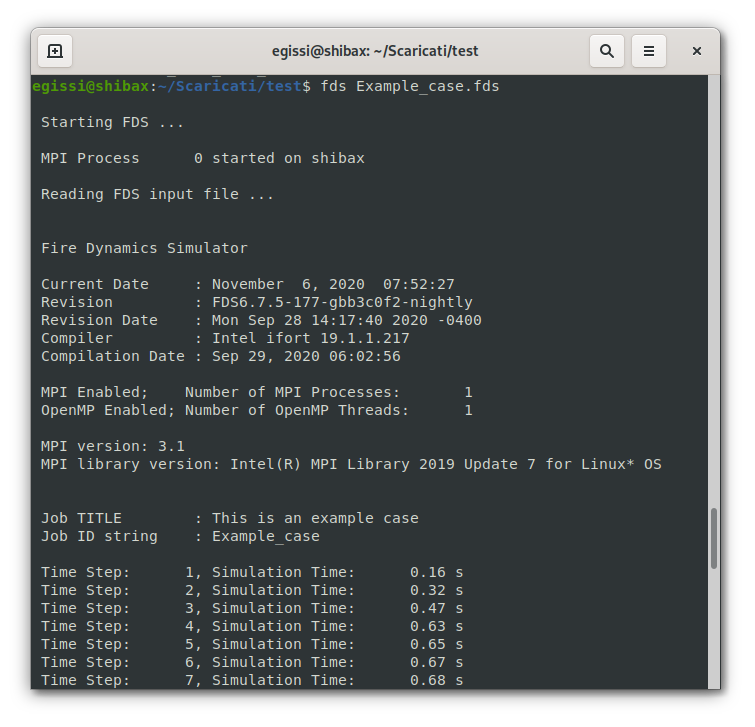
On Linux, I open a terminal window, move to the appropriate directory, and type fds Example_case.fds to run the solver on the Example_case.fds that was just exported from BlenderFDS.
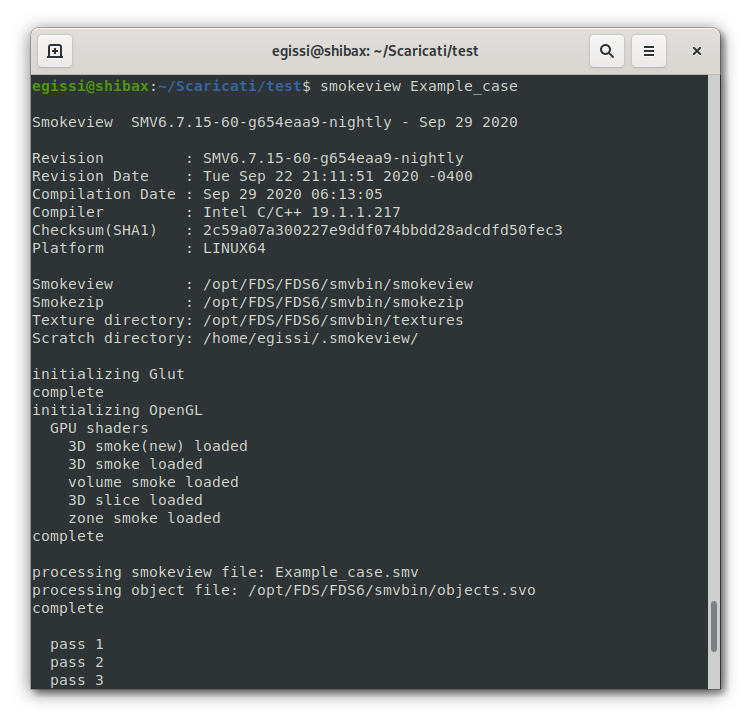
While the case is being solved, I can have a peek on what is going on by running Smokeview from another Linux terminal window.
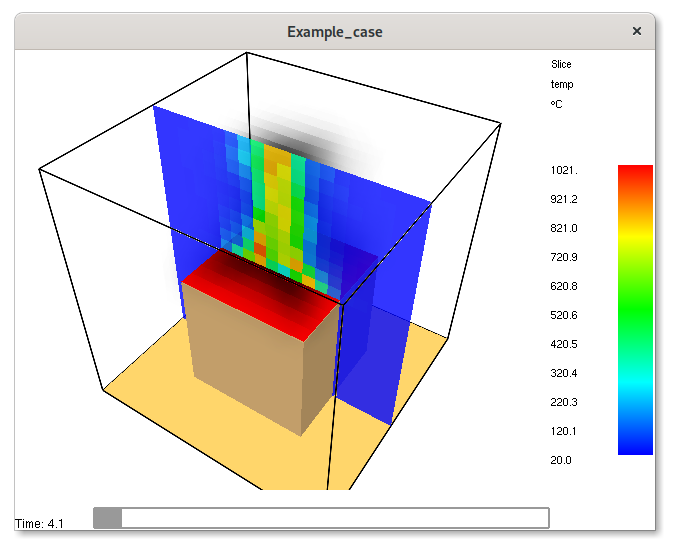
The newly opened Smokeview window displays all the wonders of the calculation we are performing.
Step 8: Go back to BlenderFDS and import an existing FDS case
While your computer is running the Example_case.fds you just created, you can go back to BlenderFDS and try another useful feature.
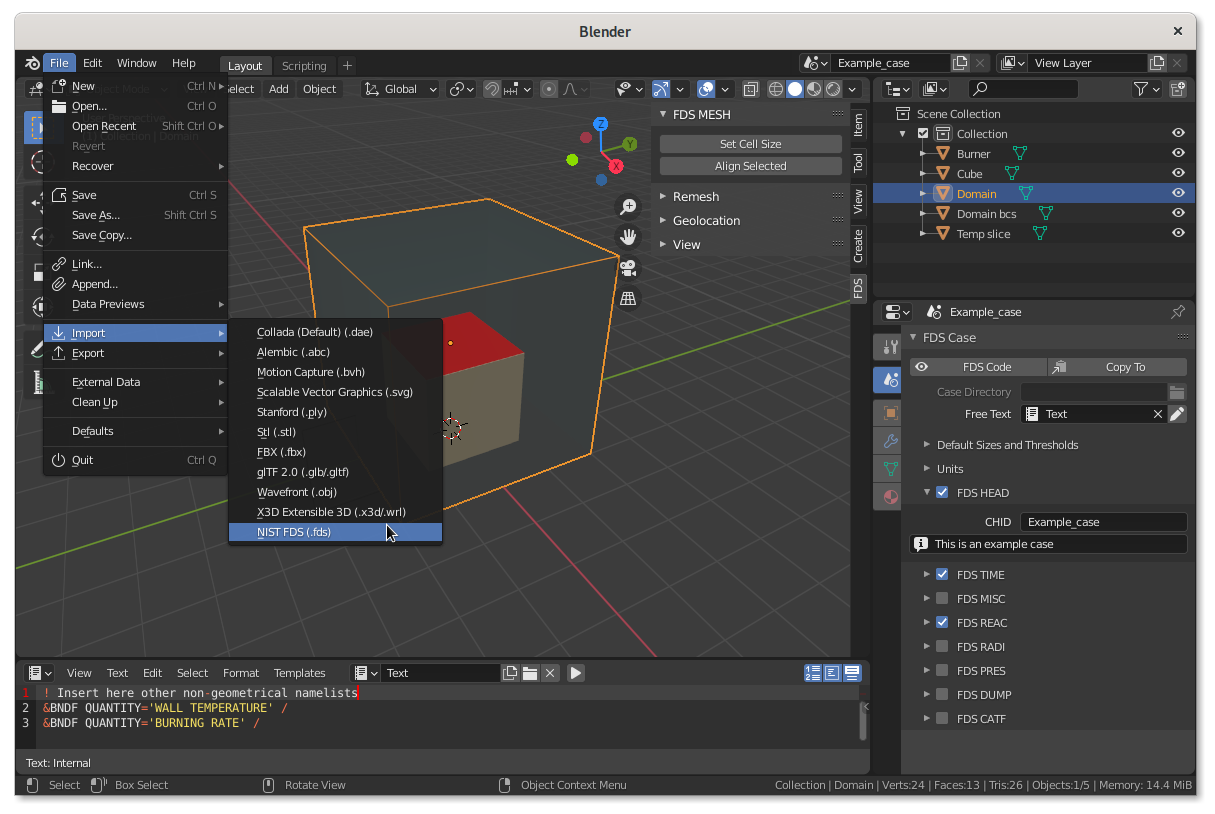
Click on the File > Import > NIST FDS menu, and import any of your FDS cases. The new case is being imported into a new Blender Scene, as each scene of a .blend file refers to a different FDS case.
The .blend file can contain many scenes, and the scenes can share data-block assets (eg. Blender Objects, Materials). So you can have one only .blend file containing all the variations of your many FDS cases related to the same project or research.
Here I am importing the couch.fds case from the example files included in the official FDS package inside the FDS/FDS6/Examples/Fires directory.
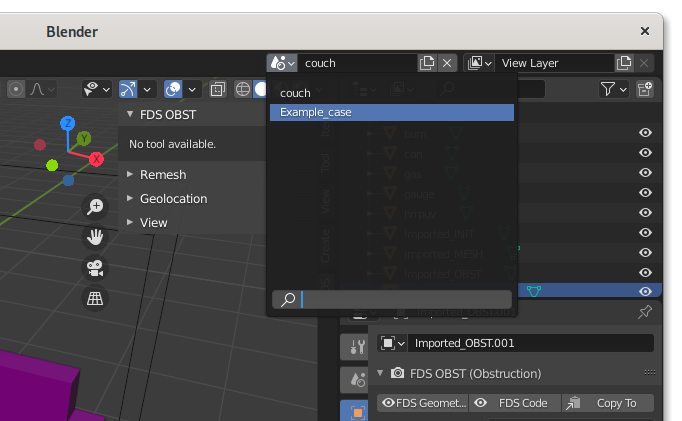
If you want to quickly, navigate between the scenes click on the pop-down menu shown in the following picture.
Step 9: Relax and enjoy
After such a long journey, you are now ready to enjoy BlenderFDS, the free and open-source user interface for FDS. Many more features are offered by its interface, described in detail by the howto pages.